A number of people wish to use iMessage on Windows PC. Packed with handful features like P2P money transfer, digital touch, the huge collection of emojis, GIF and superior encryption, iMessage is, without a doubt, the best thing for messaging. The only drawback is that it is only available for iDevices. However, by using the Guide that I’m presenting in this post, you can download iMessage on PC. Yes, you read that right.
There are ways to use your favorite messaging service on your PC. I’ll explain How to use iMessage on PC in a brief manner. Get on board.

Note: There is not a straightforward way to download and install imessage app on Windows. Though there is a simplified method through which you can get the task done. However, you still need to have a Mac in order to take the benefit of this method. This might not be a straightforward method but there isn’t any alternative available as of yet.
How to use iMessage on Windows PC
There are 3 tried and tested methods for the folks who wish to use iMessage on PC. You don’t have to achieve a complex feat, but just follow some simple steps that will guide you to use iMessage on Windows. The methods are simple, effective and handy to get the amazing interface of iMessage on your Windows PC.
1. Use the Chrome Remote Desktop
The Chrome Remote Desktop is a remote desktop software which allows users to remotely access another computer through Chrome browser or a Chromebook. You can seek its help to use iMessage on PC. Also, You must have a Mac with iMessage and a Windows computer to try this method. Follow these steps in order to use iMessage on your Windows computer:
Step-1: Firstly, download Chrome and Chrome Remote Desktop on both of your Mac as well as Windows PC.
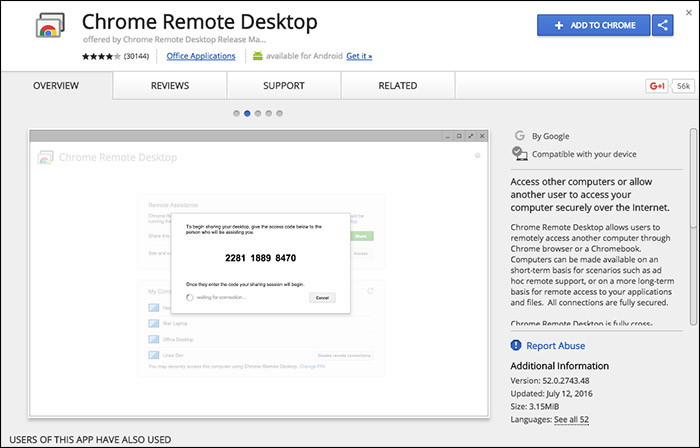
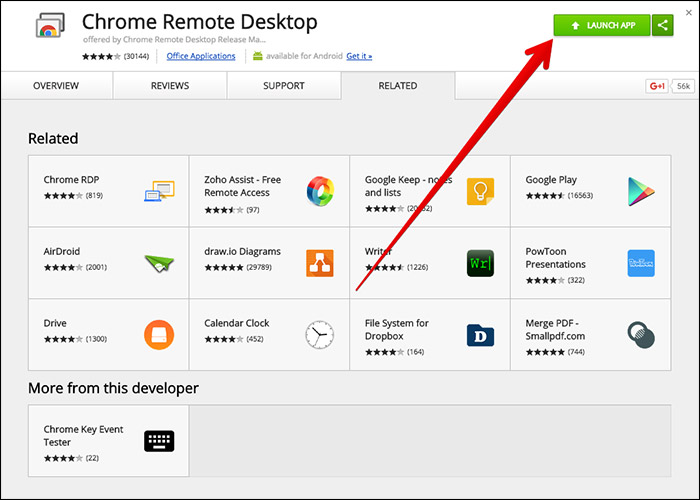
Step-2: After installing it, click on Launch app to run it.
Step-3: Download Chrome Remote Desktop Host Installer on your Mac.

Step-4: After downloading it, install it on your Mac. Follow the steps in the installation wizard properly.
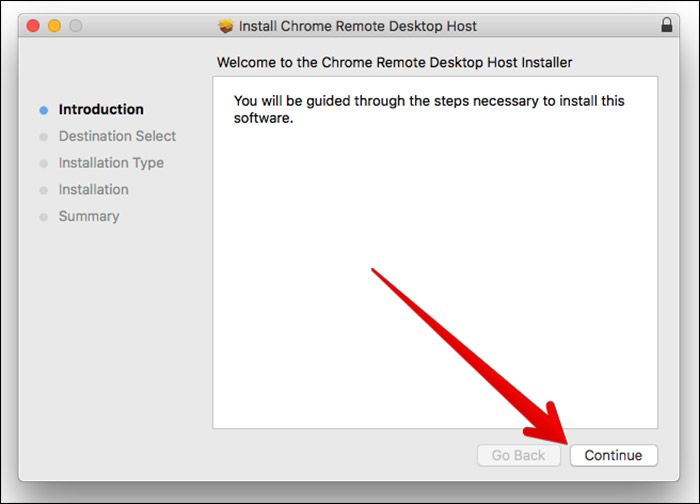
Step-5: Once you have successfully followed the steps in the installation wizard, click on Close to finish the process. One added advantage of Chrome Remote Desktop is that you can also easily access your apps and files securely.

Step-6: Now use the code appearing on the screen to connect both the computers. Then, get started.
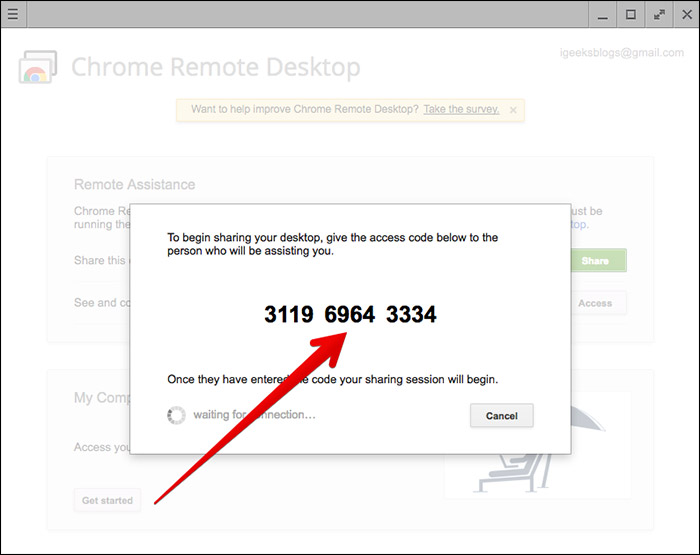
Step-7: Done. You can now enjoy using iMessage on your Windows computer.
The method is simple and quick. The only drawback it has is that not everyone has a Windows PC and Mac both. So if you are one that ‘not everyone,’ the next method will work out for you.
2. Use iPadian 2 to use iMessage on Windows 10
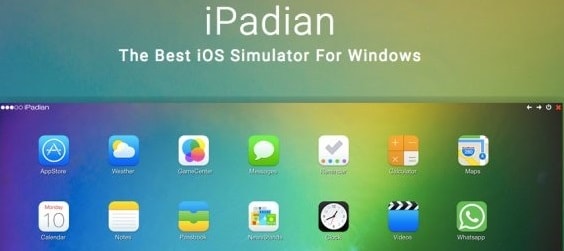
iPadian 2 is an iPad Simulator that enables your Windows PC to convert and allows it to run iOS apps. The emulator provides Standalone Adobe air application.
This could be very handy for the users who want to test or play around with iOS apps on their Windows device. Using iPadian 2, you can use iMessage on Windows 10. Follow these steps in order to learn how:
Step-1: Firstly, download the iPadian emulator.
Step-2: Now install the file with the .exe extension on your PC.
Step-3: Run the emulator. Then, accept its Terms and Conditions.
Step-4: After completing the process of installation successfully, launch the iPadian software on your computer.
Step-5: Now search for “iMessage” in the search bar.
Step-6: Just download the iMessage app on your Windows computer.
Step-7: Finally, after it is downloaded, launch the app and cherish the experience of iMessage on Windows PC.
Done. However, if you didn’t like iPadian 2, we have another method waiting for you below which also uses a third-party app.
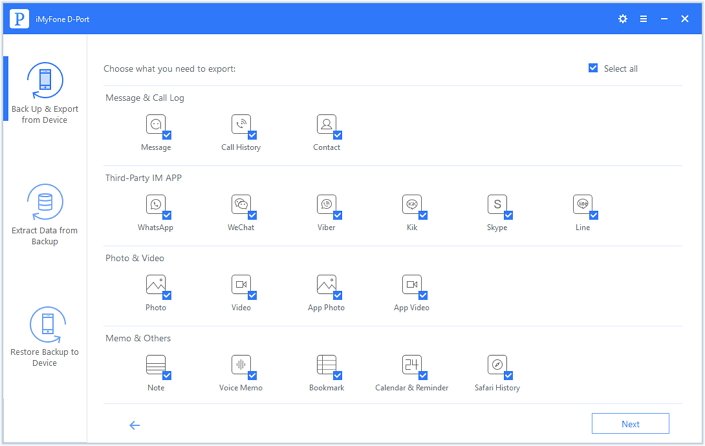
3. Use iMyFone D-Port
iMyFone D-Port is a third-party Data Exporting app that can help you to view and access iMessage on Windows 10 PC. Firstly, let’s take a quick look at the features provided by this app:
- It can transfer both textual and media content, such as messages, photos, videos and audio in conversations from iPhone to computer.
- It makes you able to preview data before transfer so that you can choose what you really need.
- It is able to view and export iTunes/iCloud backup which is unreadable for you before.
- Using this, you can export 20 types of files, including WhatsApp, Kik, notes, voice memo and more.
Follow these steps in order to learn how to use iMyFone D-Port:
Step-1: Firstly, download and install iMyFone D-Port on your Windows computer, and then launch it.
Step-2: In the app, click Start to choose file types you need to export from Export from iOS Device tab. For example, Message, and click on Next.
Step-3: iMyFone D-Port will now ask you to connect your iOS device to the computer. Connect it and just follow its prompt appearing on your screen.
Step-4: After connecting your iOS device, click on the Scan button. iMyFone D-Port will scan your device.
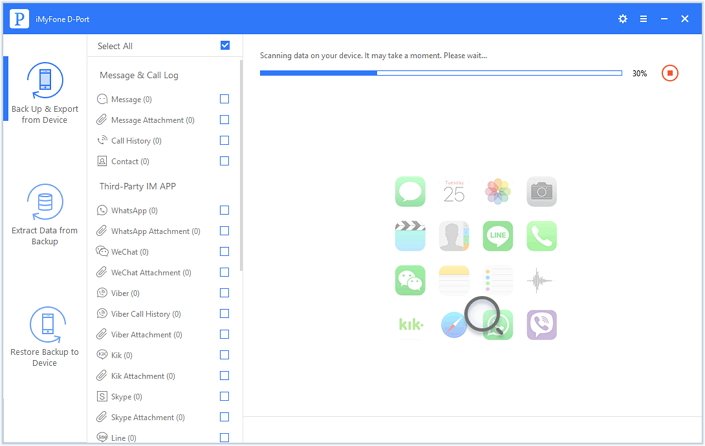
Note: It may take some time depending on the storage of your iOS device.
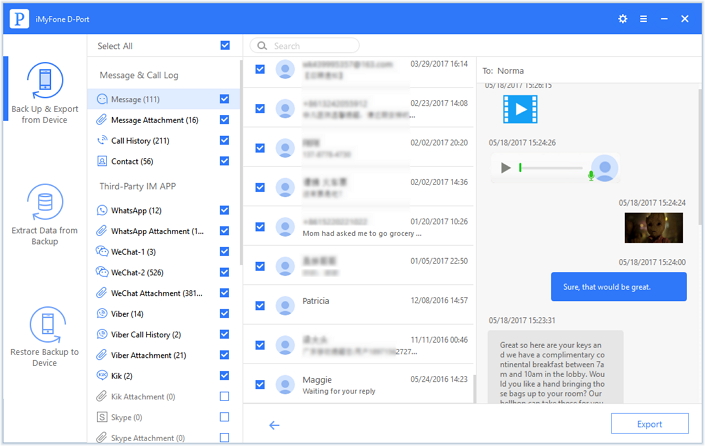
Step-5: After the scanning is completed, iMessages on the device will be displayed on your PC screen. You can check the files by clicking them individually and choose the desired files.
Step-6: Finally, click on the Export button present in the bottom right corner. A pop-up window will appear asking you to locate where you want to store the iMessages on your computer.
Done. You can now use iMessage for Windows.
Also Read: How to find wifi password on Mac
Summary
There are a lot of people who desire to get the rich experience of using iMessage on their Windows PC. However, there is no direct method to run iMessage on PC.
For these people, these 3 Methods are none less than a blessing. You can use any one of the three ways I presented to get iMessage running on your Windows PC. If you have another way, do tell us in the Comments section below. Also, for any queries, doubts or suggestions, visit the Comment box fast. I’ll be obliged to help you out. Hope I helped you to run iMessage on your Windows PC.
![[Solved] iTunes Could Not Connect to the iPhone Error – 2024 Guide](https://www.digitalcare.top/wp-content/uploads/2017/12/itunes-12-iphone-xr-100794135-large-211x150.jpg "[Solved] iTunes Could Not Connect to the iPhone Error – 2024 Guide")

![How To Delete Downloads On Mac [3 Ways] – 2024 Guide](https://www.digitalcare.top/wp-content/uploads/2018/04/downloads-211x150.jpg "How To Delete Downloads On Mac [3 Ways] – 2024 Guide")